
Construction
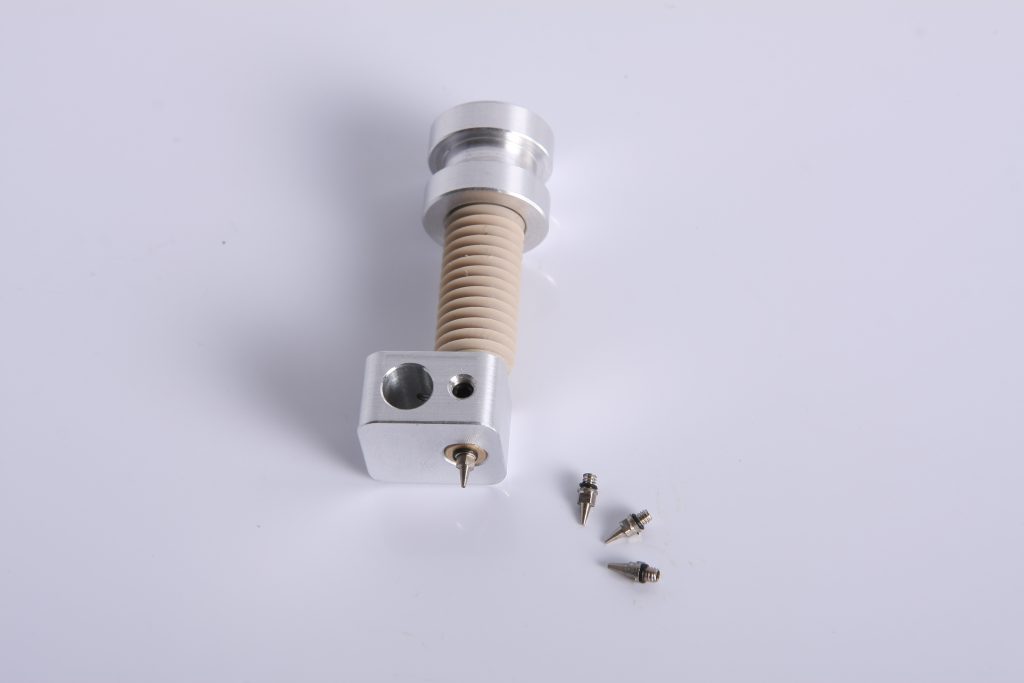
The Hotend is made up of the following parts:
20 mm long 6mm diameter Brass Nozzle
30 mm long 10mm diameter PEEK Heatbarrier
20 mm long 6mm diameter PTFE Inlay
1 pcs. Airbrush Nozzle
Heatblock for 6mm diameter nozzle, 10mm thick
The Brass part is threaded with M6 on the upper half.
Drill diameter for 3mm filament is 3.2mm, for 1.75 filament it is 1.9mm.
Drill depth is ca. 18mm, you need at least 2mm material remaining at the lower end.
For the airbrush Nozzle a hole with M 1.75 thread is needed at the lower end.
M1.75 is not the exact size of the thread of the airbrush nozzle, it
makes sure that the nozzle sits tight and does not leak. If you were to
use the correct thread the nozzle would leak and possibly unscrew itself
during printing.
The PTFE part needs an outer M6 thread.
Drill diameter for 3mm filament is 3.1mm, for 1.75 filament it is 1.8mm.
The PEEK part needs an outer M10 thread and an inner M6 thread. When drilling or machining PEEK take it slowly and use a lot of coolant/lubricant.
The Hotend is simply assembled by screwing the PTFE fully into the PEEK until it sits flush. Then screw in the brass part from the other end and tighten it against the PTFE. I usually use a 1.8mm reamer to make sure the PTFE isn’t blocking the filament path after this, for 3mm filament use a 3.1mm reamer.
The tight connection between the PTFE and the brass prevents leakage. Different to designs that use thinner PTFE liners the thick 6mm PTFE tube can take a lot more mechanical pressure and does not deform as easily.
Assembling
- Doublecheck that the parts are clean, especially small PTFE parts can quickly jam the nozzle.
- Make sure the inlay is screwed into the PEEK part deep enough, the upper end should sit flush in the PEEK.
- Tighten the brass nozzle enough so it
sits tight against the PTFE, check that a little bit of threading is
still visible so you know it sits tight against the PTFE, not the PEEK.
If you don’t tighten this sufficently you get a small gap between PTFE
and brass which will allow plastic to escape.
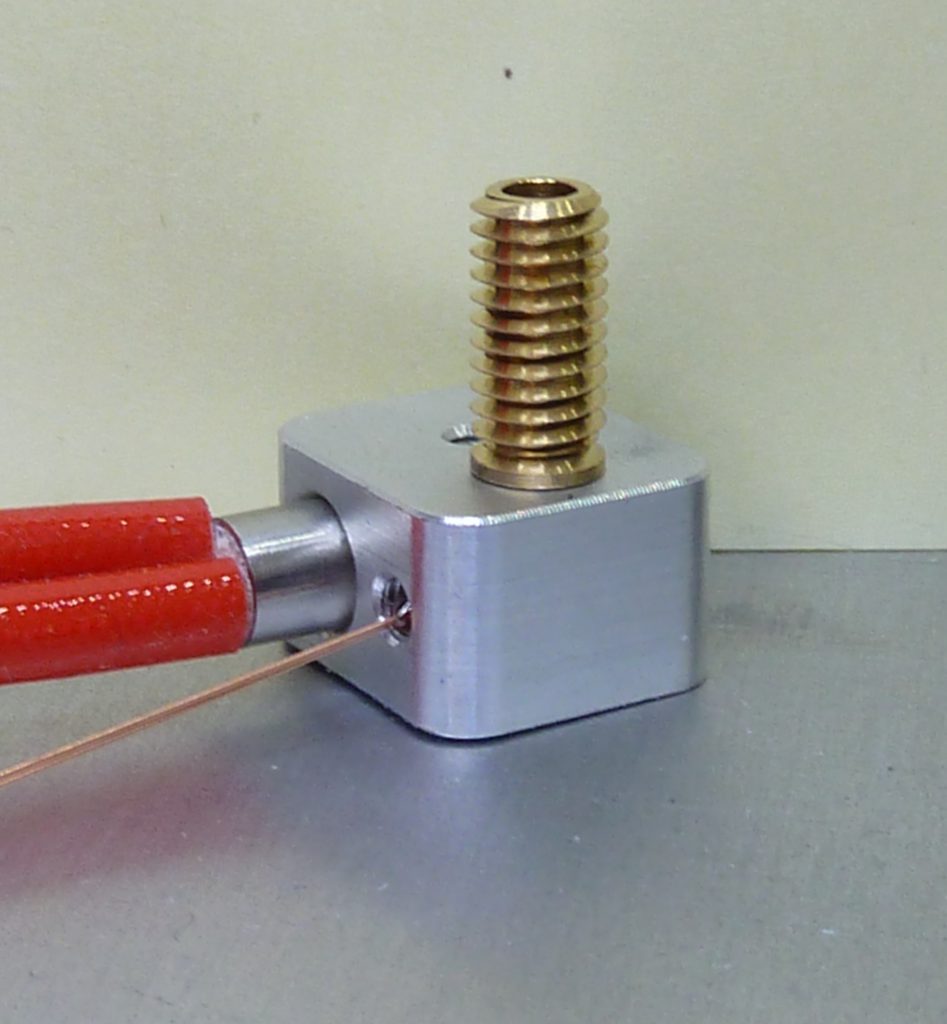
You can check the tightness by inserting some filament in the cold hotend, if you can easily push it right down to the end of the brass it isn’t to tight. If it stops within the PEEK part it is to tight. - When inserting the Thermistor take care not to damage it, this happens faster then you think.
- Glue the Thermistor in place using red seal, or similar heat resistent flexible glue. You can get away with thermal paste, but you have to make sure that the thermistor stays in the heatblock using different means then and that the paste is rated for 250+ C°.
- Make sure the Thermistor leads are sufficently insulated using heat resistant insulator. I prefer to use small PTFE tubes.
Some requested more detailed info on the assemling of the heater block.
Attach you can see the heater block as it comes with the Merlin Nozzle from RRD and how the components belong together
You should use a thermal glue or heat resistent silicone to mount the thermistor. Using thermal paste for thermal conductivity and Kapton to fixate it can work, but from my experience it is not a lasting solution. Also make sure that the wires of the thermistor are correctly isolated, especially if you use thermal compound since that is often conducting electricity.
Personally i use very small PTFE tubings to isolate the thermistor contacts, thermal glue to fix the thermistor and Kapton to hold it all together.
This is how a heater block might look after a couple of rolls of different materials and some rough handling. Please note that it still works just fine.

License
The Merlin hotend is released under CERN OHL 1.2
Replacing the Nozzle
To replace the nozzle heat the hotend up to beyond the glazing temperature of the material last used. It needs to be very soft, but not fully liquid.
With a pair of flat pliers it is now easy to unscrew the nozzle without leaving much plastic residue.
In case the tip of the nozzle was damaged or broken off you can use a 1.5mm drill or similar to remove the thread from the brass part. If done carefully the thread will not be damaged and a replacement nozzle can be screwed in directly.
Where to get it
The Merlin Hotend is meant as a DIY item, the minimum tools you need is a drillpress, though a lathe makes things easier.
If you want to buy one you can get it in several online stores, please note that i do not sell the hotend, i am merely the developer of it and use it myself.